Simple Methods to Change Image Designs into Brother Machine Stitch Files
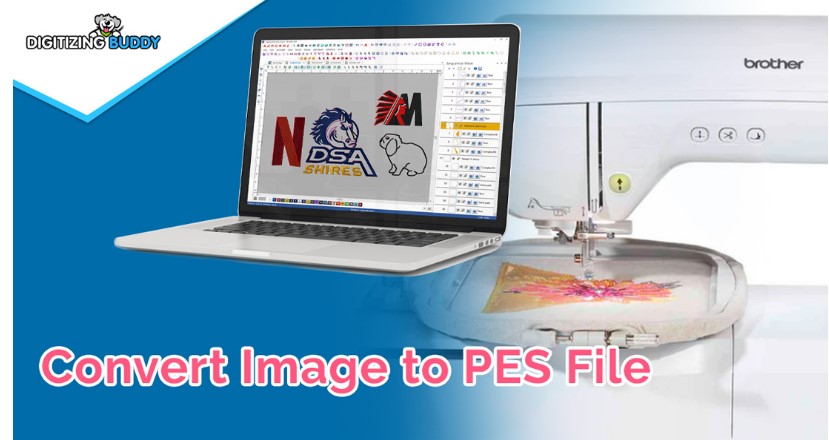
Embroidery is a fun and creative craft. Many people start with a simple image. It can be a logo, a small drawing, or even clip art. But an image alone will not work on an embroidery machine. The machine needs a stitch file. That file tells the machine how to place each stitch.Many beginners feel confused at this step. They try to load a picture into the machine, but it does not work. This is where tools like a Brother PES file Converter can help.
These tools change normal images into stitch files that Brother machines can read. With the right steps, anyone can learn how to prepare images for embroidery.This guide will show simple ways to turn image designs into stitch files. The steps are easy to follow. Even if you are new to embroidery, you can learn them.
Why Image Files Cannot Work Directly
A picture file and a stitch file are very different. They may look the same on a screen, but they work in a different way.
How Image Files Work
Image files like JPG or PNG store color and pixels. Each pixel is just a tiny dot of color. The computer shows many pixels together to make the picture.
Embroidery machines do not read pixels. They do not know what a pixel means.
How Stitch Files Work
A stitch file gives clear commands to the machine. It tells the machine:
- Where to start stitching
- Where to stop
- Which thread color to use
- What stitch type to use
Because of this, the image must be changed into a stitch format before the machine can use it.
Common Image Formats Used in Embroidery
Before you convert a design, you need to know the type of image file you have.
JPG Files
JPG is one of the most common image formats. It is often used for photos and simple graphics.
But JPG files are not perfect for embroidery. They may lose quality when edited many times.
PNG Files
PNG files keep better quality. They also support clear backgrounds. This makes them useful for logos and icons.
Vector Files
Vector files like AI or SVG are great for embroidery work. They keep sharp edges. They are easier to convert into stitch paths.
Preparing an Image Before Conversion
Good preparation makes the conversion process easier. If the image is messy, the stitch result will also look messy.
Keep the Design Simple
Embroidery works best with simple shapes. A logo with too many details can be hard to stitch.
Try to remove small parts or thin lines. These may not stitch well.
Use Clear Colors
Clear color areas help the digitizing process. Each color can become a thread color.
If the image has many shades of one color, it may create extra stitches.
Adjust the Size
Think about the final size of the design. If the design is too small, the details will not show.
Set the correct size before converting the file.
Methods to Change Image Designs into Stitch Files
There are several ways to turn images into embroidery stitch files. Some are easy. Some need more skill.
Use Automatic Conversion Software
Many embroidery programs offer auto conversion. This feature scans the image and creates stitches.
Steps for Auto Conversion
- Open the embroidery software
- Import the image file
- Choose the auto digitize option
- Adjust stitch settings
- Save the design as a PES file
Auto conversion is quick. But it may not give the best results for complex designs.
Manual Digitizing
Manual digitizing gives better control. This method takes more time, but the quality is much higher.
How Manual Digitizing Works
A digitizer traces the image. They draw stitch paths over the shapes. Each shape becomes a stitch type.
Common stitch types include:
- Satin stitch
- Fill stitch
- Running stitch
Manual digitizing also lets the designer control stitch direction and density.
Use Online Conversion Services
Some people prefer online help instead of learning software. Many services can convert images into embroidery files.
Professional services review the design. They adjust it for the best stitch quality.
This option is helpful for business logos or complex artwork.
Companies like Embroidery Digitizing Services in USA – Digitizing Buddy often provide this type of support for embroidery businesses and hobby users.
Choosing the Right Stitch Types
Stitch type plays a big role in the final look.
Satin Stitch
Satin stitch works well for letters and borders. It creates smooth and shiny lines.
Fill Stitch
Fill stitch covers large areas. It uses a pattern of stitches to fill space.
Running Stitch
Running stitch is a simple line stitch. It works well for outlines and light details.
Important Settings for Better Stitch Files
Small settings can change the whole look of an embroidery design.
Stitch Density
Density controls how close the stitches are.
- High density = thick stitching
- Low density = lighter stitching
Too many stitches can make the fabric stiff.
Stitch Direction
Stitch direction affects the shine and texture of thread. Changing the direction also helps separate shapes.
Underlay Stitches
Underlay stitches go under the top stitches. They help support the design and keep the fabric stable.
Testing the Stitch File
Never start full production without testing the design first.
Run a Test Stitch
Load the file into the machine and stitch it on scrap fabric. This helps check:
- Thread breaks
- Misplaced stitches
- Wrong colors
Check Fabric Type
Different fabrics behave in different ways.
A design that works on cotton may not work the same on fleece or denim.
Testing saves time and thread.
Common Mistakes Beginners Make
New embroidery users often repeat the same errors.
Too Many Details
Tiny shapes and thin lines do not stitch well. They may disappear or break.
Ignoring Fabric Type
Fabric stretch can change the look of stitches. Always match the design to the fabric.
Skipping Test Stitches
Skipping testing can lead to wasted thread and fabric.
When to Use Professional Digitizing Help
Some designs are too complex for quick conversion tools.
Logos with gradients, shadows, or small text often need expert work.
Professional digitizers know how to simplify the design. They also know how to set proper stitch paths.
Many embroidery shops work with experts such as Embroidery Digitizing Services in USA – Digitizing Buddy to get clean and accurate stitch files.
This saves time and gives better results.
Tips for Better Embroidery Results
Small habits can improve your embroidery projects.
Keep Designs Clean
Always start with a high-quality image.
Limit Thread Colors
Too many colors can slow down production. Try to keep the design simple.
Organize Stitch Order
Plan the stitch order from center to outside. This helps keep the fabric stable.
Use Good Stabilizer
Stabilizer supports the fabric during stitching. Choose the right type for each fabric.
Tools That Help with Conversion
Some tools make the process easier.
Embroidery Software
Programs like embroidery editing tools allow users to digitize and adjust designs.
These tools offer features like:
- Auto digitizing
- Stitch editing
- Thread color settings
Graphic Design Programs
Programs used for vector art help prepare clean designs before digitizing.
Clean artwork leads to cleaner stitch files.
Building Skill in Embroidery Digitizing
Digitizing is both art and skill. Practice helps a lot.
Start with simple shapes. Then move to logos and text. Over time, you will learn how stitches behave on different fabrics.
Watching stitch tests also helps you understand how designs work.
Many professionals learn through trial, practice, and real projects.
Why Quality Digitizing Matters
Good digitizing makes embroidery look sharp and clean.
Bad digitizing can cause:
- Thread breaks
- Puckered fabric
- Uneven shapes
Quality stitch files save time and materials.
Because of this, many businesses rely on trusted services like Embroidery Digitizing Services in USA – Digitizing Buddy to prepare their designs for machines.
Final Thoughts
Turning an image into a stitch file may seem hard at first. But with the right steps, it becomes much easier.
Start with a clean design. Prepare the image carefully. Choose the right conversion method. Always test the stitch file before final use.
With practice, you will understand how stitches work and how designs behave on fabric.
Embroidery is a mix of creativity and technical skill. When both come together, the result is a beautiful stitched design that lasts for years.